The Arduino Duemilanove is a little bit outdated but has some advantages:
If you do not have one at hand you can try to get a clone from ebay.
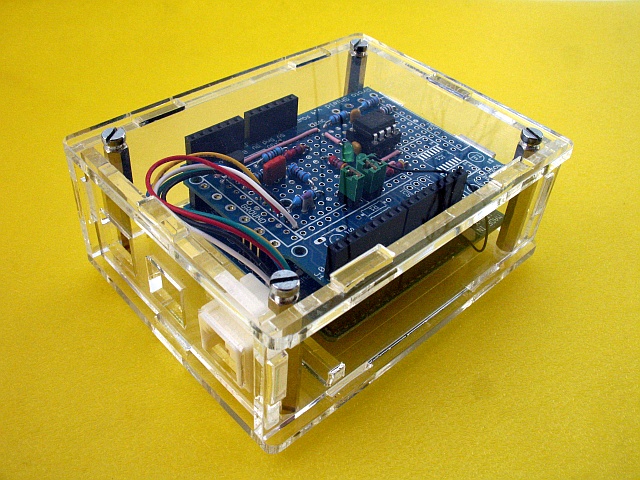
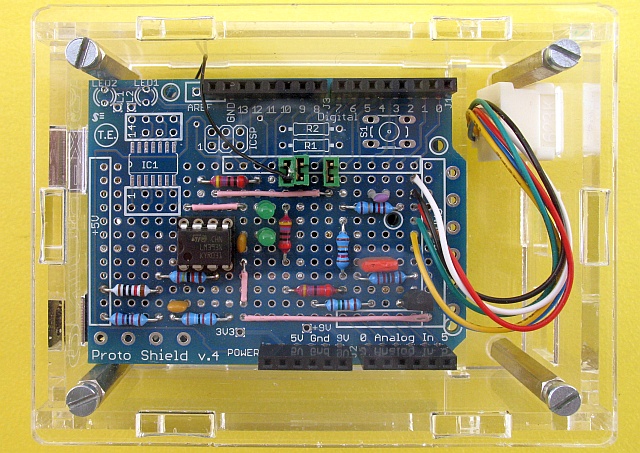
Here I will also show you a simple LocoNet Shield build on a Arduino Proto Shield.

Download from https://www.arduino.cc/en/Main/Software and install.
I used Version 1.6.9 / Windows Installer.
Follow Instructions on http://mrrwa.org/download/ for download and import.
Download latested LbServer_0.NN_Win32_Setup.zip from
https://sourceforge.net/projects/loconetovertcp/files/LbServer/,
unzip and execute setup.exe.
Download latested LbServer_0.NN_Source.zip
from https://sourceforge.net/projects/loconetovertcp/files/LbServer/, unzip,
build and execute make install. You can validate the installation by starting
the help screen of LbServer with LbServer -h.
$ unzip LbServer_0.12_Source.zip
$ cd LbServer_0.12_Source/server/LbServer/
$ make
g++ -pipe -Wall -W -O2 -g -fexceptions ...
$ sudo make install
strip --strip-all Debug/LbServer -o Release/LbServer
cp Release/LbServer /usr/local/bin/
$ LbServer -h
LocoBuffer Server version 0.12.0.0, for protocol version 1, built Jul  7 2016,
released under GPL by Stefan Bormann.  Linux port by Ian Cunningham.
...
$
A simple LocoNet Shield can be build by using a Proto Shield. I used the following schematic:
)](Loconet_Shield.png)

Required:
Connect Arduino and Shield.
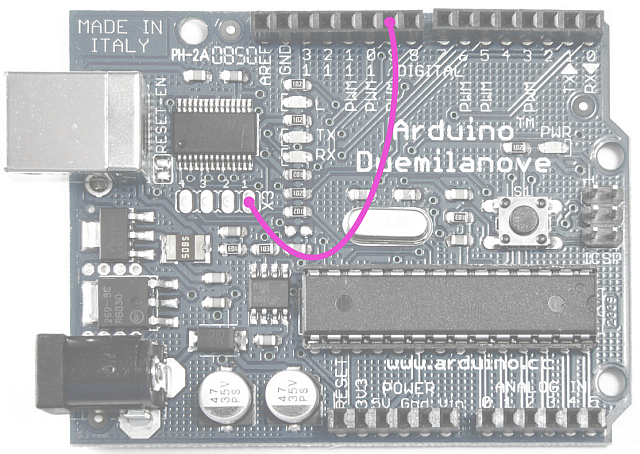
Connect the hardware handshake line CTS on the Arduino (X3 Pin 1) to Digital IO 9:

Connect the Arduino to your PC by USB.

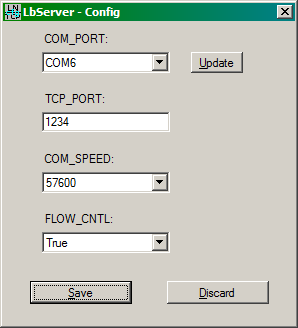
Start LbServer
Start >> All Programs >> LocoNet over TCP >> LbServer
Connect some Clients and see if Receive and Send is working:

Start LbServer from a terminal with required arguments.
Connect some Clients
$ LbServer /dev/ttyUSB0 1234 57600 true
LocoBuffer Server version 0.12.0.0, for protocol version 1, built Jul  7 2016,
released under GPL by Stefan Bormann.  Linux port by Ian Cunningham.

Loconet device port opened on /dev/ttyUSB0 with 57600 baud and CTS flow control.
TCP server started on port 1234.
Output uses single characters for increased performance:
R=received packet, .=nothing received but event was signaled :-(
s=send request, S=sent successfully, e=send error
C=client connected, D=client disconnected
RRRRRRRRRRRRRRRCsRSRsRSsRSsRSsRSsRSsRSsRSsRSsRSRRRRRRRsRSRsRSsRSsRSDR
As of April 2023 there are newer version available of the software used. As there is a bug in the old LocoNet version so please use: